|
Show: E-brake handle Installation |
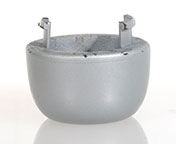
This is a description of my experience removing the emergency brake handle on an R56. You must decide whether you want to try it yourself, or have a professional do the installation. The first thing to do is to remove the e-brake handle cap. I pried mine off with a screwdriver. Some people have been able to just pull it off. It is held in place by two plastic tabs.
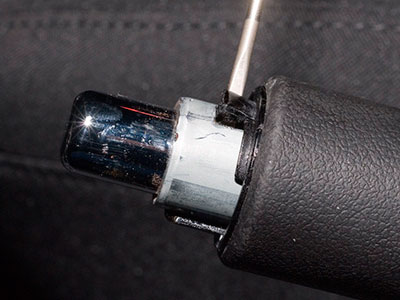
Next, release the tab that holds the rest of the handle in place. I used a small screwdriver to pry it. An ice pick might work.
The point on the tab is very long, so it needs to be pried way up to release. Once you have the tab clear of the hole, slide the handle forward to keep the tab from going back in the hole.
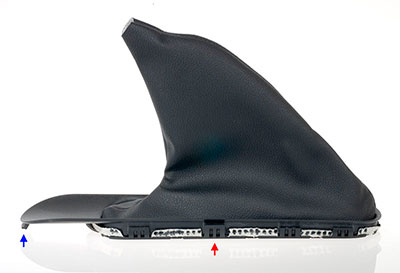
It is may be necessary to remove the boot to completely remove the handle. On my R56, the tie that holds to boot to the handle was not fully tightened, so I didn't really need to remove the boot. However, I expect that was not typical. It seems that the best way to remove the boot is to carefully pry each side of the plastic boot base in the middle to release the tabs holding it to the console. Then lift or pry the back end up. Be careful not to scar up the plastic of the console.
There is a tab in the front end of the boot base. So, best to tip it up from the back end and slide it back to release that tab (blue arrow below). I found it impossible not to break a couple of tabs off of the e-brake boot. These two tabs (red arrow) stick out farther than the others and are rather fragile. They don't seem critical in holding the boot in place. Mine stays down quite well without them.
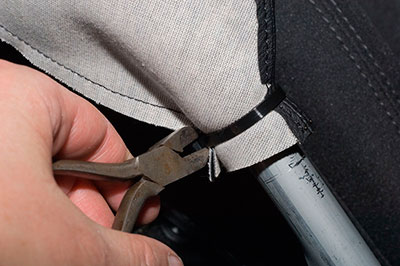
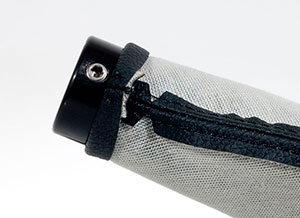
Now turn the boot inside-out by pulling the base up and forward over the handle. You will find a plastic tie holding the boot to the handle. Cut this tie. I found that wire cutters work well. Careful not to cut the boot. Slide the boot and handle off of the e-brake lever. The boot should still be inside-out. Extract the handle from inside the boot. Replace the factory handle with the wooden handle by feeding it into the base of the boot, aluminum adaptor first. Push it through so the end of adaptor is flush with the end of the boot. In the photo below I have rolled back some of the boot so you can see the adaptor.
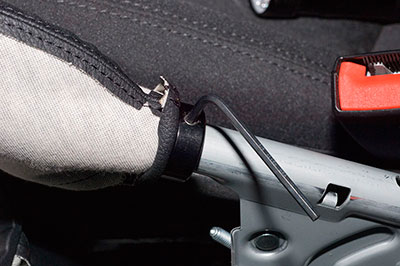
A new plastic tie is included in the box with the wooden e-brake handle. Put that tie around the boot over the groove between the adaptor and the wood. Tighten the plastic tie. If you wish, you can leave the tie off. In the two boots I've seen, the opening is tight enough to hold the boot to the handle. This would make it easier to swap handles if you have one for special occasions and one for every day. With the boot still inside out, slide the handle onto the brake lever as far as it will go. Pull the boot back far enough to see that the button is sticking all of the way out of the handle. Tighten the stainless steel setscrew in the aluminum adaptor to hold the handle in place. There will be a hex wrench taped to the underside of one of the flaps in the shipping box. This is a 1/8 hex wrench that fits the setscrew on the handle.
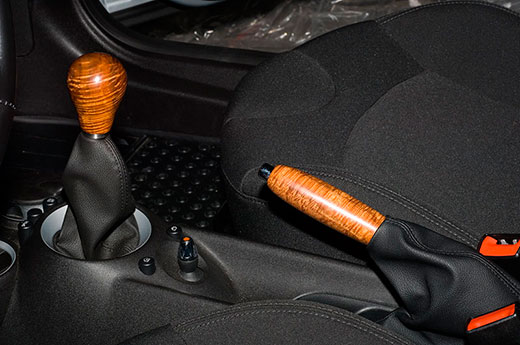
With most handles I've aligned the wood grain so the most attractive part is in line with the setscrew being at the top. If you have other preferences you can turn the handle any way you want, except don't put the setscrew at the very bottom. There is a groove on the underside of the lever. If the setscrew goes into that groove it could interfere with the spring in the handle. If you want the screw on the bottom, just turn it to the side a little so it misses the groove. Turn the boot right-side-out over the lever. Push the base down so the tabs engage the console. You are done.
|
